From zero to your first WhatsApp message
Install guide · Plugin 2.10.0
Install the plugin, connect your number with Meta and let Connection Doctor check every setting. The plugin steps show the real screens, so you always know where to click.
Before you start
Have these ready and the setup goes in one go. The requirements guide explains each one.
Your store
- WordPress 6.0 or newer and PHP 8.1 or newer
- WooCommerce 7.0 or newer, for the store features (order messages, cart reminders, login codes)
- HTTPS on your store address
- Permalinks set to anything except “Plain”
- An administrator login to your WordPress
- A public privacy-policy page on your store
For WhatsApp and Meta
- A phone number you own that can receive an SMS or a call
- That number not in the WhatsApp or WhatsApp Business app (or you delete it from the app first)
- A Meta business portfolio, your own
- A payment method for your WhatsApp account at Meta
- Products that WhatsApp’s Commerce Policy allows
How long it takes
Your part, in your WordPress dashboard and in Meta, is a series of short steps. Meta’s reviews set the pace, so here is how long each part takes.
- The plugin: quick. Uploading the plugin, activating the license and pasting your settings is quick work in your WordPress dashboard.
- Meta business verification: hours to days. It can take a few days, and it runs on Meta’s side while you carry on.
- Template review: minutes to 24 hours. Templates are usually reviewed within a few minutes, and at most 24 hours.
Meta reviews your templates and your business while you carry on. Until your order templates are approved, the plugin simply has nothing to send for them. Meta timings as of 17 October 2026.
12 steps to your first message
Steps 1 to 4 get the plugin running, 5 to 7 happen in Meta, and 8 to 12 bring the two together. The plugin steps and pictures are for version 2.10.0, the current one (labels checked on 31 October 2026). Meta changes its own screens from time to time, so steps 5 to 7 are described in words, as of 17 October 2026.
-
Check that your store is ready
Go through the list in Before you start. Not sure about your PHP version? In WordPress open Tools → Site Health → Info, or ask your host. After you install the plugin, WAPI Connect → Health & tools → System status shows your PHP, WordPress and WooCommerce versions with a tick or a cross.
-
Buy a plan and download the plugin
Pick your plan on the pricing page. After you pay, your receipt e-mail brings your license key and a link to your receipt, where you download the plugin as one .zip file. Your orders and downloads also stay in My account.
Keep the file zipped. If your computer unzipped it by itself (Safari on a Mac does this), download it again with that option off, or use another browser.
-
Upload and activate the plugin
In WordPress open Plugins → Add New Plugin → Upload Plugin, choose the .zip file, press “Install Now”, then “Activate Plugin”. A new “WAPI Connect” item appears in your admin menu.
The screens start in ArabicTo switch to English, open WAPI Connect → Settings («الإعدادات», the last item) → General («عام»). In the first field, Plugin language (your screens), which the Arabic screen calls «لغة الإضافة», choose English and press Save Settings («حفظ الإعدادات»). Your customers’ language is a separate field just below it.
Nothing goes to customers yet: the plugin, order messages and cart reminders all start switched off. Read the install and license guide.
-
Activate your license
Open WAPI Connect → Settings → License, paste the key from your receipt e-mail and press “Activate”. You see your plan, its status, the renewal date and how many sites use the key. The key brings plugin updates through WordPress and our support.
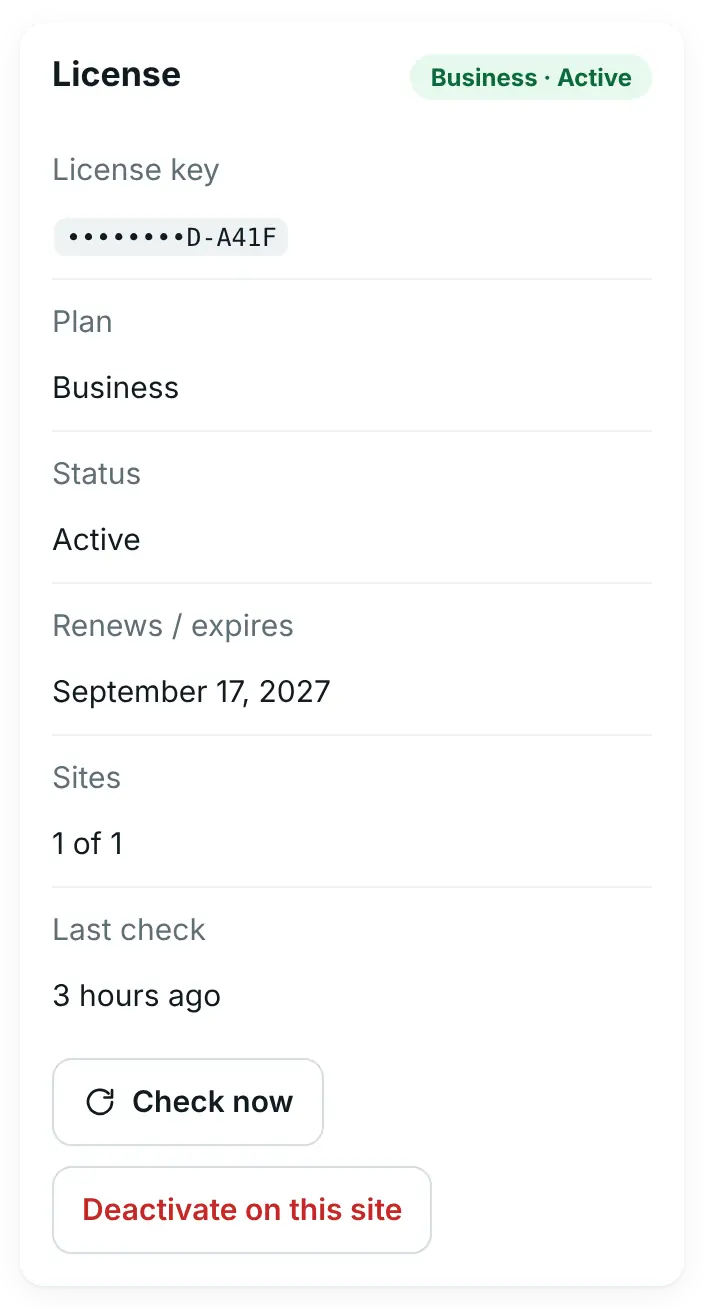
Settings → License after activation: plan, status, renewal date and sites. “Active” means the key works; “Check now” asks our server again. Demo store data. -
Create your Meta app
At developers.facebook.com, sign in with the Facebook account that manages your business, create an app for WhatsApp and connect it to your own Meta business portfolio. Your app is where the phone number, the token and the webhook live. Step-by-step: create your Meta app →
-
Add and register your phone number
Add your number to your WhatsApp Business account, confirm it with the code Meta sends by SMS or call, and register it on the Cloud API with a 6-digit PIN that you choose. Meta reviews your display name. Then add a payment method to the WhatsApp account, because Meta bills your messages there. Step-by-step: your phone number →
On the app’s WhatsApp → API Setup page you now see two long numbers: the Phone Number ID and the WhatsApp Business Account ID. You need both in step 8.
-
Create a permanent access token
The token on the API Setup page stops working after 24 hours. Create a System User in your Meta business settings, give it your app and your WhatsApp account, and generate a token that does not expire. Step-by-step: the permanent access token →
-
Paste your details into the plugin
Open WAPI Connect → Settings → WhatsApp API and fill in:
- Phone Number ID and WhatsApp Business Account ID from API Setup
- Permanent Access Token from step 7
- Webhook Verify Token: any secret word you make up; you type the same word in Meta in step 9
- App Secret (optional, recommended): in your Meta app, under
App settings › Basic. With it, the plugin accepts only messages that Meta signed
Then open the General tab, tick “Enable Plugin” and press “Save Settings”.

Settings → WhatsApp API: the Phone Number ID, the WhatsApp Business Account ID, the token and the webhook verify token, each with where to find it. The values are hidden here. Demo store data. -
Connect the webhook
The webhook is how Meta tells your store about customer messages and delivery statuses. Copy your store’s Callback URL from WAPI Connect → Overview, under “Webhook URL” in the Setup card. It looks like this, with your own store address at the start:
https://your-store.com/wp-json/almorshed-whatsapp/v1/webhook
“almorshed-whatsapp” is the plugin’s original technical name; it is the same plugin. In your Meta app open WhatsApp → Configuration, paste the address as the Callback URL, type the same verify token as in step 8, press “Verify and save”, then turn on the
messageswebhook field. Step-by-step: the webhook and its fields →, including the fields for account alerts and calls. -
Let Connection Doctor check everything
Open WAPI Connect → Health & tools → Connection Doctor. Problems come first, each with what to do: a “Subscribe now” or “Send them to this store” button fixes the most common one in one click. Then send a WhatsApp message to your business number from another phone and press “Check again”. When “Webhook receiving” shows your last customer message, your store hears your customers.
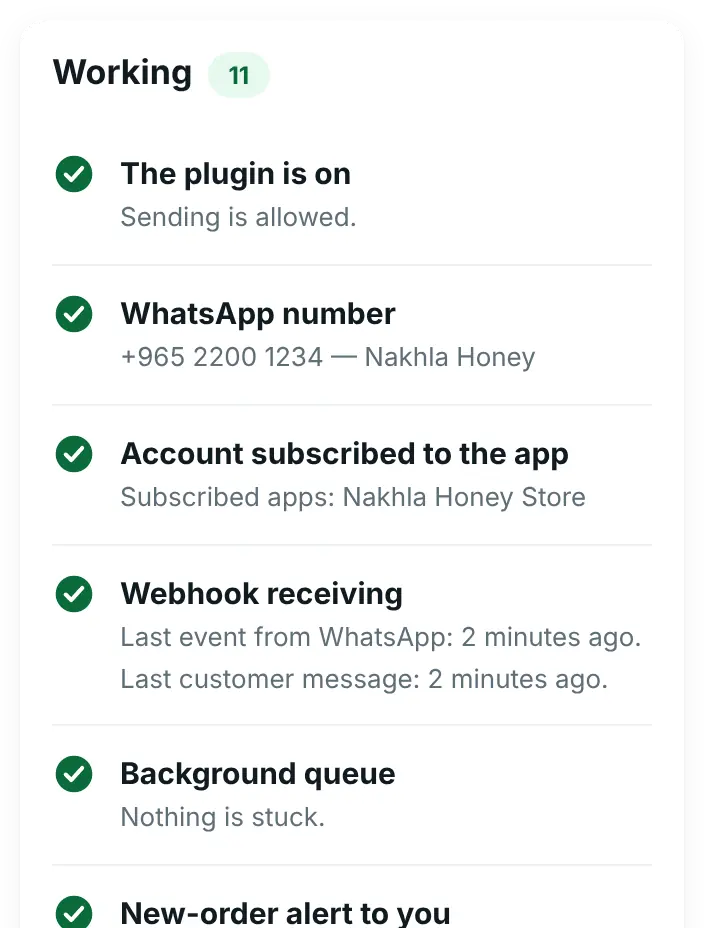
Connection Doctor when everything works: one “Working” card, each check with what it last saw. “Webhook receiving” shows when the last message from WhatsApp arrived. The first 5 of the 11 checks are shown; 6 more follow in the list. Demo store data. -
Pick a template for each order status
Order updates use templates that you create in WAPI Connect → Templates (or in Meta’s WhatsApp Manager) and Meta approves (how templates work). Then open WAPI Connect → Order messages, turn on “Send order updates on WhatsApp” and open a status. Tick “Send this message when an order becomes …”, choose its template, choose what fills each variable, check the preview and press “Send test” to get it on your own phone. Press “Save”, and repeat for the other statuses you want.
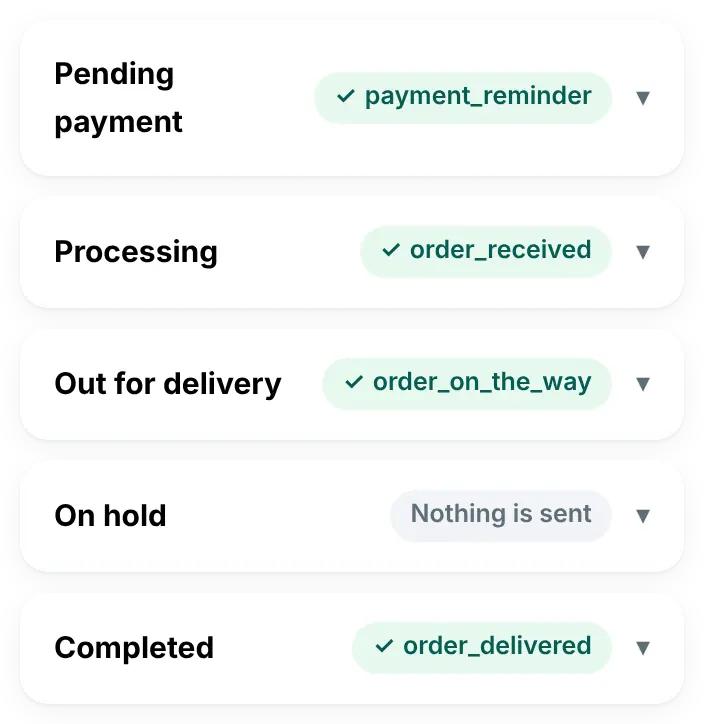
WAPI Connect → Order messages once you are done: each status with the template it sends (its name in green; customers never see it). “Nothing is sent” means no message for that status. Demo store data. The preview and the test use an order from your store, so place one test order first if the store has none. More about order messages.
-
Install the inbox on your phone Pro plan and up
Open WAPI Connect → Inbox and press “Open the inbox”, or go to your-store.com/wapi-inbox/ on your phone.
- iPhone (iOS 16.4 or newer): open the link in Safari, tap Share, then “Add to Home Screen”. Open the app from its new icon, log in with your WordPress username and password, tap “Turn on notifications”, then “Allow”.
- Android: open the link in Chrome, log in the same way and tap “Turn on notifications”.
Now reply to the message you sent in step 10. That is the first message from your store. More about the inbox app.
After step 12, on your phone
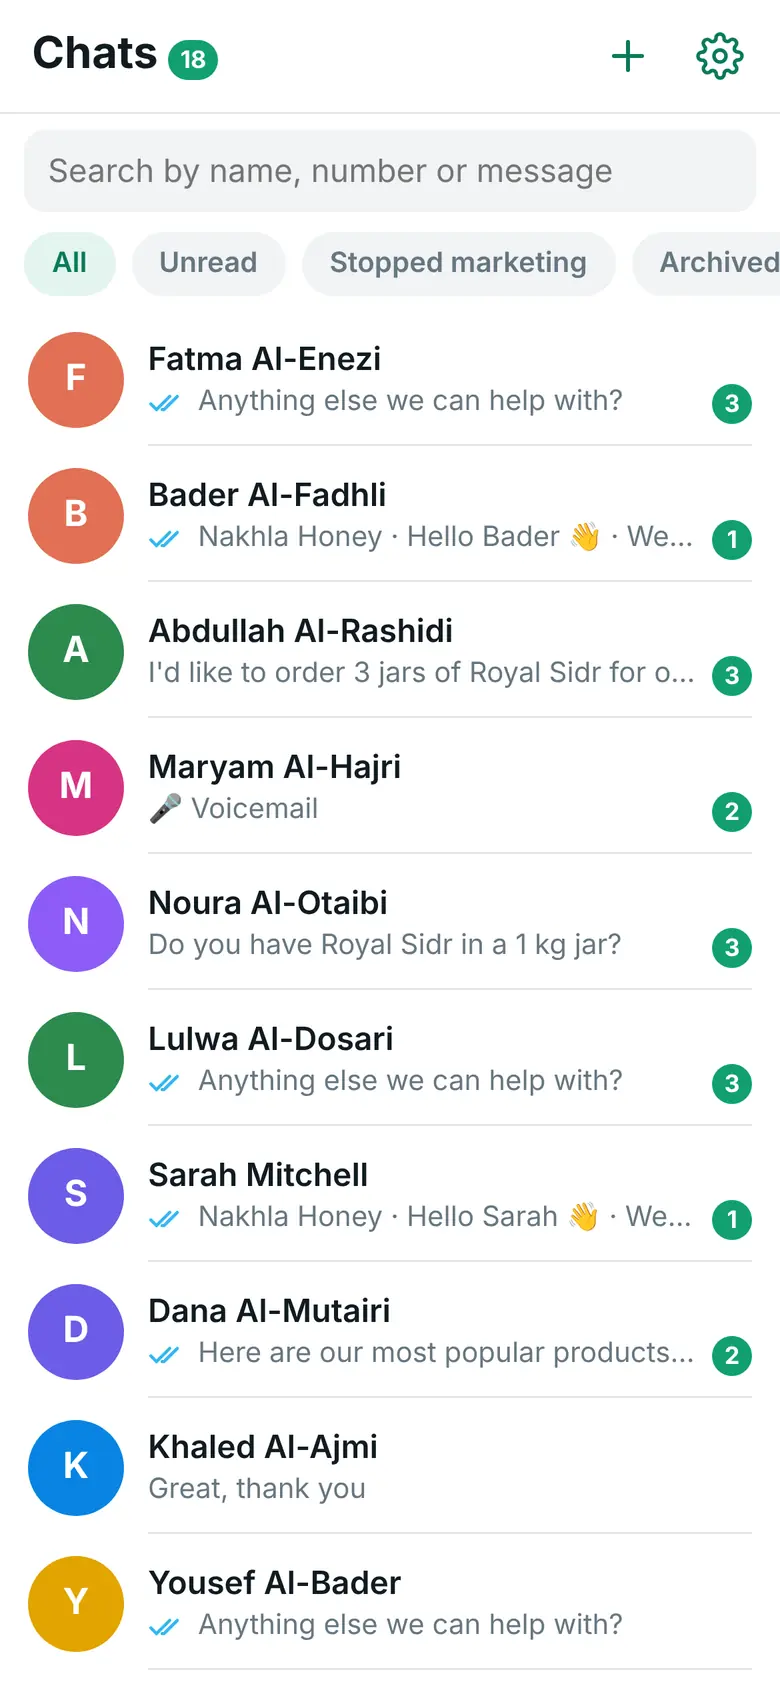
WAPI Connect → Overview has a “Setup” card that ticks off each part, from the WhatsApp API details to the license, with a “Set up” button next to anything still open.
Stuck? We do it for you
For $99 (≈ 30 KD) once, we set up the Meta part with you over a screen share, on your own Meta account. It works with any plan.
What we set up
- Your Meta app and WhatsApp Business account, in your own Meta business portfolio
- Your number, registered with its PIN
- A permanent System User access token
- The webhook and the App Secret
- Your first order-message templates, sent to Meta for review
What stays with Meta
- Meta’s reviews: templates take from a few minutes up to 24 hours, and business verification can take a few days
- Meta’s message charges, which Meta bills to you
See it working first
The real plugin on a demo store: order messages, the inbox, automations and a campaign report.
Read the video as text
WhatsApp for your WooCommerce store, with WAPI Connect Pro.
Each order status sends its own WhatsApp message.
Pick an approved template and the plugin fills in the order details.
The preview shows the message filled in with a real order.
If a customer leaves a cart, they get a WhatsApp reminder with a link back to it.
You see the sales that came back after the reminders.
Your team answers every chat from the inbox app on their phones.
The welcome menu answers first: products, orders, opening hours.
Saved replies: one tap and the answer is ready.
The customer's orders are right there, next to the chat.
Automations answer for you, day and night.
Build the conversation like a map: messages, buttons, products and a hand-over to your team.
Every step shows how many customers chose it.
Campaigns: a template with a picture and buttons, sent only to customers who opted in.
Choose who gets it: a tag, recent buyers, or everyone.
The report shows who received it, read it and replied, and why some messages failed.
Account health: your daily limit, quality rating and costs from Meta.
The Connection Doctor checks every step of the connection and tells you what to fix.
Install it, connect your number, and start today.
Questions while you install
Which plan do I need for these steps?
Steps 1 to 11 are the same on every plan. The inbox app in step 12 is part of Pro, Business and Agency. On Starter, your first message is the test from step 11. See the plans.
Can I use my current WhatsApp number?
Yes, but it leaves the WhatsApp or WhatsApp Business app on your phone, because the plugin runs it on Meta’s Cloud API through your own Meta app. Keeping it in the Business app at the same time (Meta calls it coexistence, offered only through some of Meta’s partners) is not offered by the plugin. Many stores pick a new number. You still answer from your phone, in the inbox app (Pro plan and up). See choosing your number.
Will customers get messages while I am still setting up?
No. The plugin sends nothing until you tick “Enable Plugin”, and order messages and cart reminders only go out once you turn them on and they have an approved template.
Connection Doctor shows a red card. Now what?
Each red card says what is wrong and what to change, often with a button that fixes it. The Connection Doctor guide explains every check, and troubleshooting covers the rest.
What does Meta charge?
Meta bills your own WhatsApp Business account for each delivered message, at its rate for your customer’s country. Since 1 October 2026 that includes messages inside the 24-hour customer service window: Meta charges nothing for the first 1,000 replies each month on each WhatsApp number, then charges its service rate. Utility templates sent inside the window are charged at the utility rate. When a customer writes from your click-to-WhatsApp ad and you answer within 24 hours, Meta charges nothing in that chat for up to 7 days. We add nothing on top. (As of 31 October 2026.) Meta’s rates are on its pricing page.
I am setting this up for a client. Anything different?
Create the Meta app and the WhatsApp account in your client’s own Meta business portfolio, not yours, so the number and the history stay with them. The steps are the same. See for agencies.
Ready to install?
Pick your plan, or ask us anything before you start.